How to Set Up Barcode Billing in a Retail Shop in Pakistan: A Step-by-Step Guide
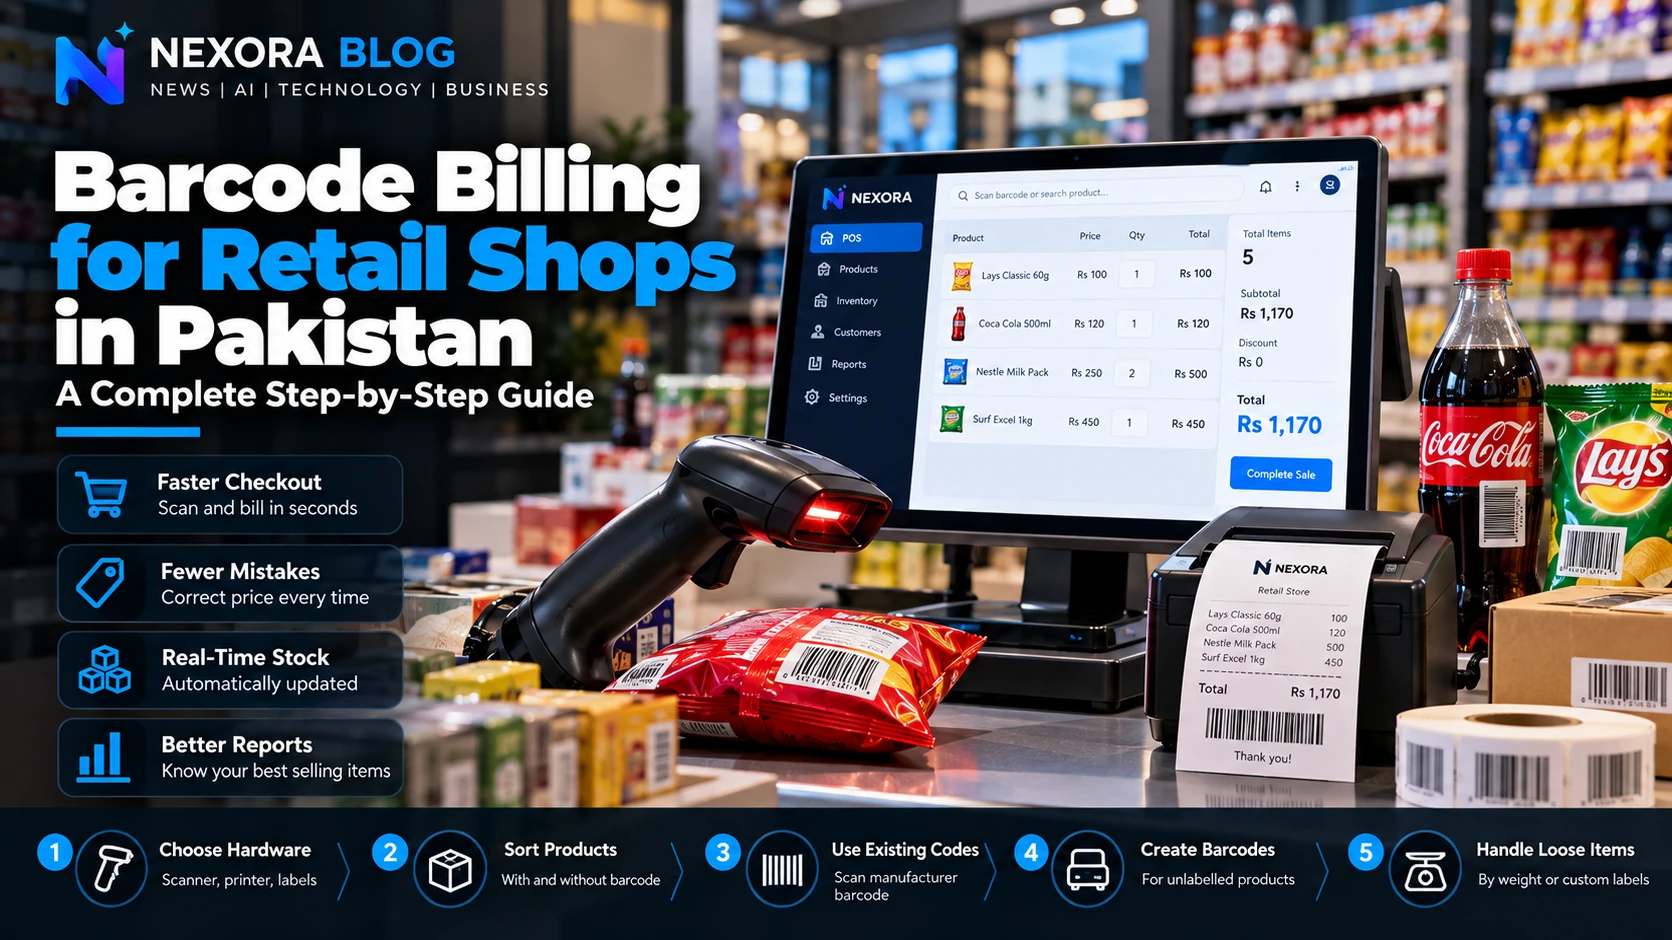
Switching a shop from manual billing to barcode scanning is mostly about preparation. This guide covers the hardware you need, how to handle products that come without barcodes, how to create your own codes, and how to go live without disturbing daily sales.
Barcode billing setup guide
Most shop owners in Pakistan who move to barcode billing do it for the same reason: the counter gets busy, prices are typed or remembered wrongly, and at the end of the day the cash never quite matches the sales. Scanning a barcode fixes most of this, because the price and the item come from the system instead of from memory.
The technology is simple. What decides whether the switch goes smoothly is preparation: getting the right hardware, dealing with products that have no barcode, and entering your items properly before the first customer is billed. This guide walks through the whole process in order.
What Barcode Billing Actually Changes
With barcode billing, the cashier scans an item, and the POS software finds the product, adds the correct price to the bill and reduces the stock by one. That single action gives you three benefits:
- Faster checkout, especially for bills with many items.
- Fewer pricing mistakes, because the price comes from the product record.
- Stock that updates itself with every sale, so low-stock alerts and reports are based on real numbers.
It also makes it much harder for sales to go unrecorded, which is often the biggest hidden benefit.
Step 1: Choose the Right Hardware
You do not need expensive equipment to start. A typical counter needs:
A barcode scanner
A basic wired USB scanner is enough for most shops. It works like a keyboard, so the POS software reads the code as if it was typed. If you sell items with QR codes, or want to scan codes from a customer's phone screen, choose a 2D scanner. For large or heavy items, a wireless scanner saves the cashier from lifting them onto the counter.
A receipt printer
Thermal receipt printers come in two common widths: 58mm, which is compact and economical, and 80mm, which prints clearer, more detailed receipts. Most busy shops prefer 80mm. Make sure the printer connection, USB, Bluetooth or network, suits the computer or tablet you will use.
A label printer, if you will print your own barcodes
If many of your products come without barcodes, a small thermal label printer is worth it. You will use it to print barcode stickers and shelf price labels.
Optional: a cash drawer and a weighing scale
A cash drawer that opens with each sale adds control over cash. If you sell loose items such as dry fruits or daal, a weighing scale helps, but plan separately for how weighed items will be priced.
Step 2: Sort Your Products Into Three Groups
Before entering anything, walk through the shop and divide your products:
- Products that already have a manufacturer barcode, such as packaged foods, cosmetics and most branded goods.
- Products you sell as-is but that have no barcode, such as locally made items, garments from small suppliers or repackaged goods.
- Loose or service items that are hard to label, such as items sold by weight or small services.
This tells you how much labelling work is ahead, and prevents surprises on launch day.
Step 3: Use Existing Barcodes Wherever Possible
For products that already have a barcode, you do not need to create anything. When adding the product in your POS, simply scan the barcode into the product's barcode field, then enter the name, sale price, purchase price and opening stock.
A useful habit: scan the actual item in your hand, do not type the number from a list. Many products have variants, such as sizes or flavours, and each variant usually has its own barcode.
Step 4: Create Your Own Barcodes for Unlabelled Products
For items with no barcode, you create internal codes that only your shop uses.
Internal codes versus official GS1 barcodes
Official retail barcodes, the EAN-13 numbers printed on branded products, are issued through GS1. Pakistan's GS1 prefix is 896, which is why many locally manufactured products start with those digits. You only need official GS1 numbers if you manufacture products that will be sold in other shops or supermarkets.
If the codes are only for use inside your own shop, you do not need GS1 registration. GS1 sets aside number ranges starting with 20 to 29 for restricted, in-store use, and many shops simply use a clear numbering pattern of their own. What matters is that every product has one unique code and that the code does not clash with a real product barcode.
A simple numbering pattern
Keep it logical so that staff can understand it. For example, the first digits can indicate the category, and the rest a running number. Write the pattern down so that everyone who adds products follows it.
Print and apply the labels
Print barcode stickers with the label printer and apply them to the product or packaging in a consistent spot. Use a label size that the scanner can read easily, and test a few labels by scanning them before printing hundreds. Check whether your POS can generate barcode labels directly; if not, label printers usually come with software that can.
Step 5: Decide How to Handle Loose and Weighed Items
Items sold by weight or in variable quantities need a plan. Common approaches are to create a product priced per kilogram and enter the quantity at the counter, to pre-pack common quantities such as half a kilo and one kilo with their own labels, or to keep a laminated sheet of barcodes at the counter for items that cannot be labelled. Choose one approach and train everyone to use it.
Step 6: Enter Opening Stock Carefully
Barcode billing only helps your inventory if the starting numbers are correct. Do a physical count, ideally after closing or on a slower day, and enter the opening stock for each product. Set a reorder level for fast-moving items, so the system can warn you before they run out.
Step 7: Set Up Users and Permissions
Give each cashier their own login. Decide who can apply discounts, who can process returns and who can edit prices. Separate logins mean every sale, return and discount is linked to a person, which makes cash differences much easier to investigate.
Step 8: Test Before Going Live
Before the real launch, run a practice day. Scan a sample of products from every category, including items with your own labels, check that prices are correct, print a few receipts, process a return and a discounted sale, and confirm that stock reduces correctly. Fix any wrong prices or unreadable labels now, not in front of customers.
Step 9: Go Live and Review After the First Week
On launch day, keep a notebook at the counter for any item that does not scan or shows a wrong price, and fix those records at the end of the day. After the first week, review your sales and stock reports. Compare the system's stock for a few fast-moving items with a quick physical count. Small differences usually point to items being billed under the wrong product, which is easy to correct early.
Common Mistakes to Avoid
- Using the same internal code for two different products.
- Typing barcodes by hand instead of scanning them when adding products.
- Skipping the opening stock count, which makes stock reports unreliable from day one.
- Letting everyone use one shared login.
- Printing labels that are too small or on poor-quality stickers that fade.
How Nexora Retail POS Supports Barcode Billing
Nexora Retail POS is built for this workflow. It handles barcode sales, returns, discounts and quick receipts that can be printed, emailed or saved, tracks stock levels, pricing and reorder alerts, and keeps customer profiles with purchase history. Store owners can give managers and cashiers different permissions, and reports show product, sales and cashier performance. Because it syncs through the cloud, the counter, the back office and mobile access stay aligned.
You can start with a free trial, add a small set of products, and run the test day described above before moving your whole shop across.
Final Thoughts
Barcode billing is one of the most practical upgrades a retail shop in Pakistan can make. The scanner and printer are the easy part. The real work is sorting your products, creating clean codes for unlabelled items, and entering correct prices and stock. Spend a few days on that preparation, and your counter will be faster and more accurate from the very first week.
Frequently Asked Questions
Do I need to register with GS1 to use barcodes in my shop?
No. GS1 registration is needed only if you manufacture products sold through other retailers. For codes used only inside your own shop, you can create internal codes, ideally in the restricted-use range starting with 20 to 29, as long as each product has a unique code.
What barcode scanner should a small shop buy?
A wired USB scanner is enough for most shops. Choose a 2D scanner if you need to read QR codes or codes on phone screens, and a wireless scanner if you often sell large items.
Which receipt printer size is better, 58mm or 80mm?
58mm printers are compact and economical, while 80mm printers give clearer and more detailed receipts. Busy shops usually prefer 80mm.
How do I bill loose items sold by weight?
Common options are to create a per-kilogram product and enter the weight at the counter, pre-pack standard quantities with their own labels, or keep a barcode sheet at the counter for items that cannot be labelled.
How long does it take to switch to barcode billing?
For a small shop, sorting products, printing labels, entering opening stock and running a test day can usually be done within a week, depending on how many unlabelled products you have.
Will barcode billing reduce cash differences?
It helps, because prices come from the system and every sale is recorded against a cashier login. Differences that remain are then much easier to trace.
Related Articles
- Retail POS and Inventory Control: A Store Owner Guide — 1 min read
- Retail Cashier Permissions: How to Keep POS Sales Secure — 1 min read
- Nexora AI Restaurant Reports – Pakistan's Next Generation AI-Powered Restaurant Analytics — 1 min read
- Warehouse Management Software in Pakistan: Complete Guide to Faster Inventory & Order Management (2026) — 1 min read